
How to Repair a Sprinkler Valve: Step-by-Step Guide
A soggy patch by the valve box, a zone that won't shut off, or a sprinkler head that barely trickles usually points to one culprit: a bad valve. Learning how to repair sprinkler valve problems yourself can save you a service call, and most fixes take less than an hour once you know where to look.
This guide walks you through diagnosing a stuck, leaking, or broken valve and fixing it with basic tools from the hardware store. You'll learn how to shut off water safely, open the valve body without cracking old plastic, clean or replace the diaphragm, and test the zone before backfilling the box. Whether you're dealing with a solenoid that won't click or a valve that never fully closes, the same troubleshooting steps apply.
We've spent over two decades installing and repairing irrigation systems across Sebring and Central Florida, and valve issues are among the most common calls we get. Sandy soil, hard water, and years of sun exposure wear these parts out faster than most homeowners expect. Follow the steps below, and if the repair turns into something bigger, like a cracked mainline or a system that needs a full redesign, that's when to call a pro instead of fixing it yourself.
Before you begin: signs, safety, and tools you'll need
Before you grab a wrench, confirm you're actually dealing with a valve problem and not a broken pipe or a bad controller wire, which call for different sprinkler system fixes. Watch for a zone that runs even when the controller is off, a head that dribbles water long after the cycle ends, or a valve box that stays muddy no matter how dry the weather gets. A sprinkler valve repair almost always starts with one of these three symptoms, and catching them early keeps a small fix from turning into a flooded yard or a dead patch of turf.
If a zone won't shut off or won't turn on at all, the valve diaphragm or solenoid is almost always the cause, not the pipe.
Safety first
Always cut power to the irrigation controller before you touch any wiring, and shut off the main water supply before opening a valve body. Working on a pressurized valve is how people end up soaked and how diaphragms get damaged during removal. If your system ties into a well pump, flip the breaker too, since a pressure switch can kick the pump on while you're mid-repair.
Tools and parts to gather
Having everything on hand before you start saves multiple trips back to the truck or the hardware store.
- Adjustable wrench or channel-lock pliers
- Flathead and Phillips screwdrivers
- Replacement diaphragm, solenoid, or full valve kit (match the brand and model)
- Small wire brush for cleaning debris
- Bucket for bailing water out of the valve box
- Plumber's grease or silicone lubricant
- Wire connectors and electrical tape
- Multimeter (optional, for testing solenoid resistance)
Most of these parts run under $20 at any hardware store, far less than what a hired-out sprinkler repair runs, and keeping a spare diaphragm kit on hand is smart if your system is more than eight years old.
Step 1. Shut off the water and access the valve
Start by locating the backflow preventer or main shutoff valve for your irrigation system, usually near the water meter or where the line enters your yard. Turn it clockwise until it stops, then run one zone manually to confirm no water pressure remains in the lines. Killing the water supply first keeps you from fighting pressure while you're trying to repair sprinkler system valve parts, and it protects the diaphragm from getting torn during removal.
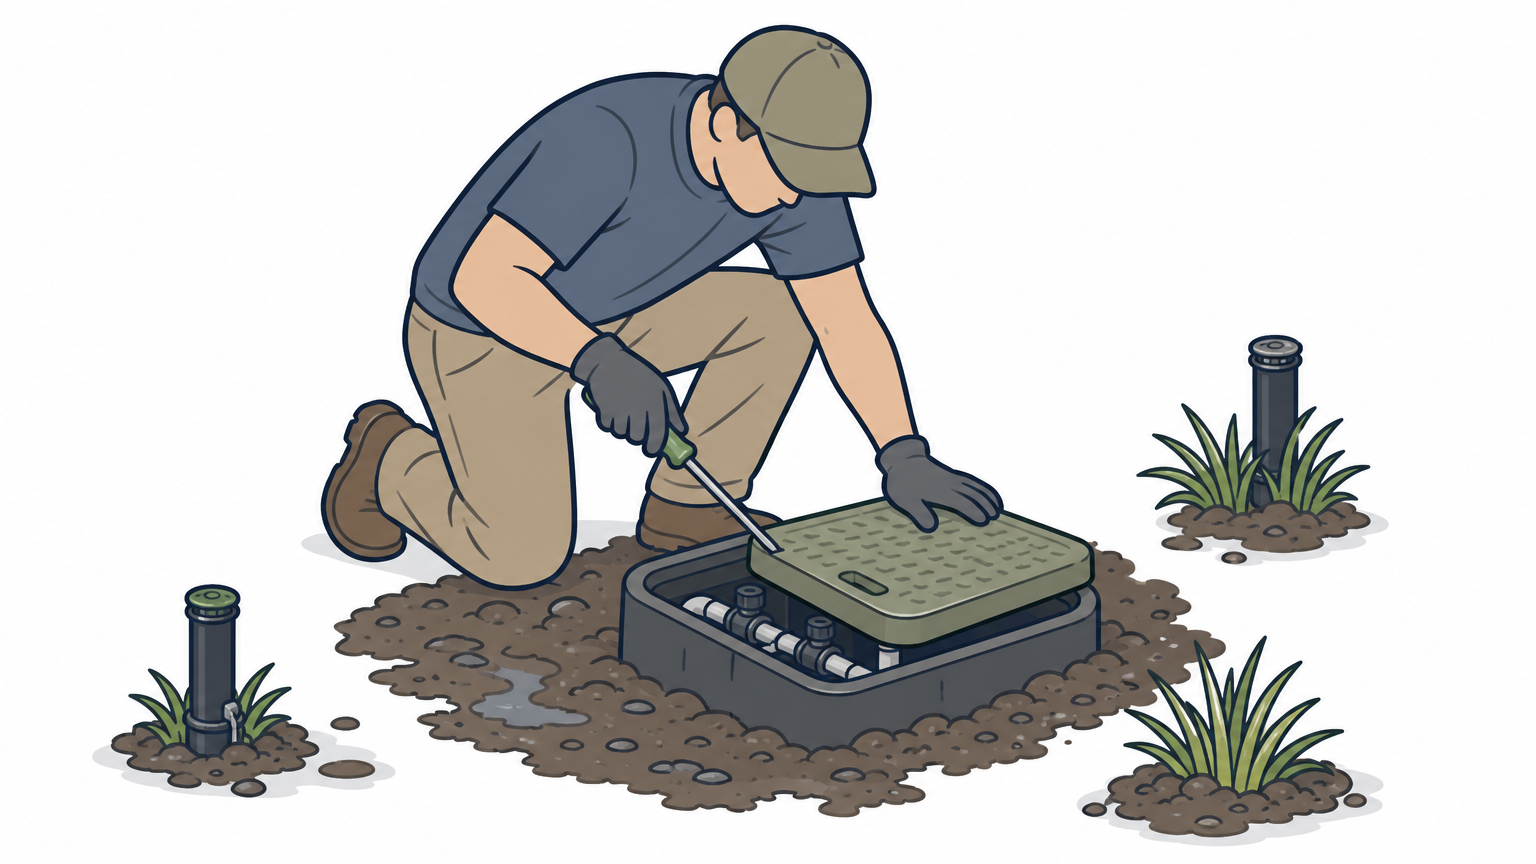
Next, find the valve box itself. It's usually a green or black plastic lid sitting flush with the ground near where each zone splits off the mainline. Pry the lid up with a flathead screwdriver, and expect some dirt, roots, or standing water inside, especially in sandy Florida soil where boxes settle over time.
Cutting the water supply before you open the valve box is the single step that prevents most repair injuries and diaphragm damage.
Bail out any standing water with a bucket so you can see the valve clearly. Brush away loose debris around the bonnet, the round cap on top of the valve, before you start disassembling anything. Wipe down the exterior so grit doesn't fall into the valve body once it's open.
Step 2. Diagnose the valve and check the solenoid
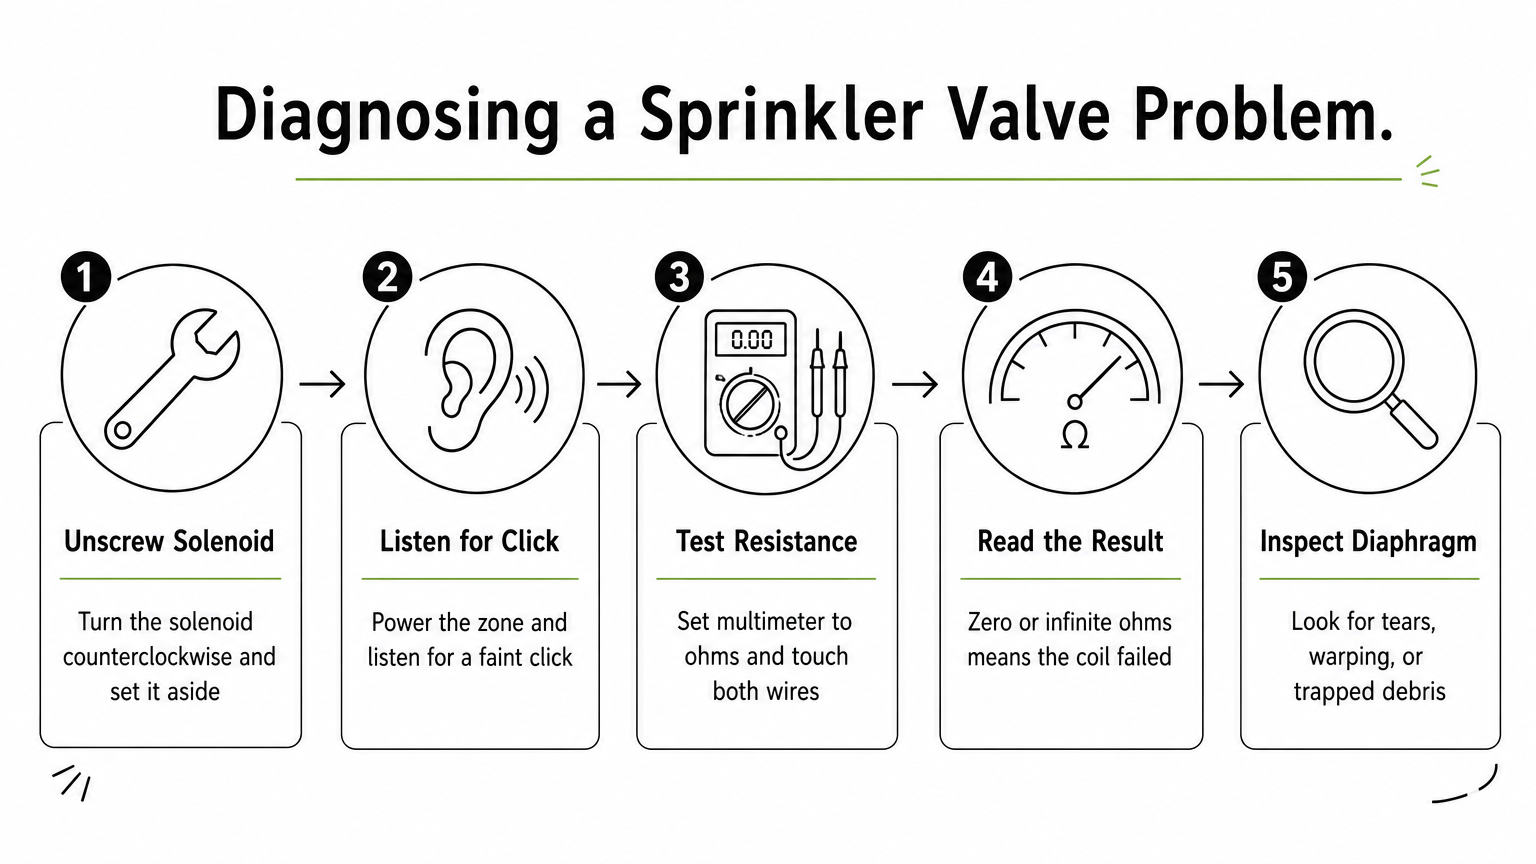
With the box open and clean, look at the solenoid first, the small cylindrical part with two wires running to it on top of the valve. Gently unscrew it counterclockwise and set it aside. A working solenoid should click faintly when the controller sends power to that zone; if you hear nothing, the solenoid is likely dead and needs replacing before you touch anything else.
Testing with a multimeter
If you have a multimeter, set it to resistance (ohms) and touch the probes to the two solenoid wires. Most solenoids read between 20 and 60 ohms. A reading of zero or infinity means the coil has failed.
A solenoid that won't click or reads infinite resistance is dead, no amount of cleaning will fix it.
Checking the diaphragm
With the solenoid out, peer down into the valve body. If you see a torn or warped diaphragm, that explains a sprinkler valve repair for a zone that won't shut off. Debris trapped under the diaphragm causes the same symptom, so note whether you're dealing with damage or just dirt before moving to disassembly.
Step 3. Disassemble, clean, or replace worn parts
Once you know what's wrong, remove the bonnet screws and lift the top of the valve straight up, keeping track of the spring underneath since it's easy to lose in the grass. Set every part on a clean rag in the order you remove it so reassembly goes faster later. Grit and sand are the most common cause of a sprinkler valve repair turning into a full teardown, so flush the valve body with your garden hose before reinstalling anything.
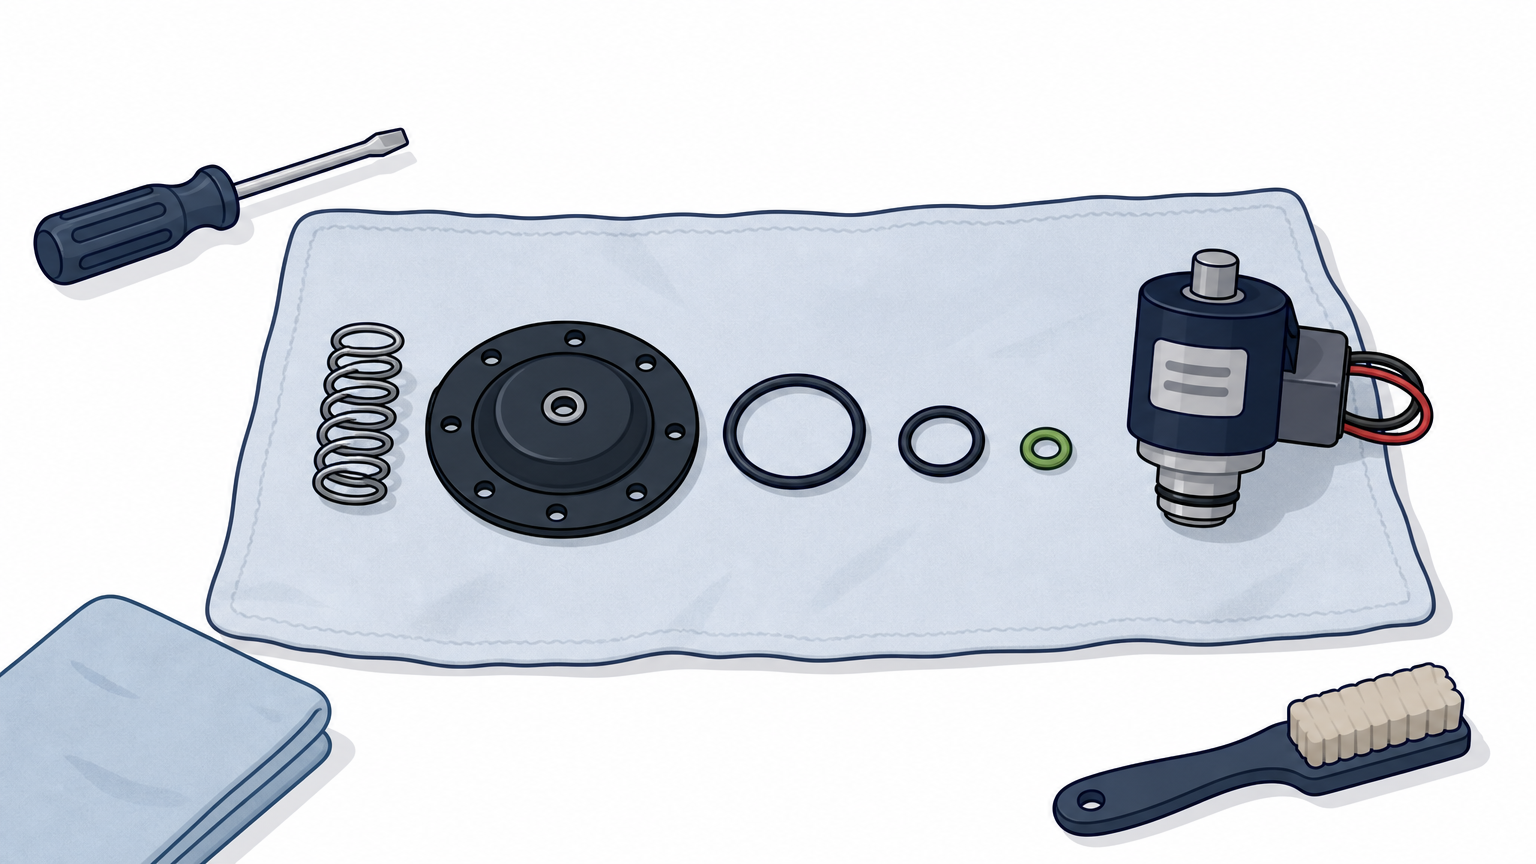
Inspect each part before deciding whether to clean it or replace it outright:
- Diaphragm : replace if torn, stiff, or warped; clean if just coated in sediment
- O-rings and gaskets : replace if cracked or flattened
- Spring : replace if rusted or bent
- Solenoid : replace if it failed the click or resistance test
A diaphragm that's merely dirty can be rinsed and reused, but one that's torn or brittle needs full replacement, not patching.
Repair kits sold for your valve's brand include the diaphragm, spring, and gaskets together, which is usually cheaper than buying parts individually and guarantees everything fits.
Step 4. Reassemble, test, and fix remaining leaks
Place the spring back first, then set the diaphragm flat and centered over the valve seat before threading the bonnet screws in a crisscross pattern to seat it evenly. Reinstall the solenoid clockwise until snug, hand-tight only, since overtightening cracks the housing. Turning the main water supply back on slowly lets you watch for leaks around the bonnet before you walk away.
Running the zone from the controller confirms whether your sprinkler system valve repair actually solved the problem, the same way you'd check any other irrigation sprinkler fix you tackle yourself. Watch the bonnet seam and the solenoid base for weeping water, and listen for the solenoid click when the cycle starts and stops.
If water seeps from the bonnet after reassembly, the diaphragm isn't seated flat, not the O-ring.
Fixing a persistent leak
If water still seeps after tightening, shut off the water again, remove the bonnet, and check that the diaphragm sits flush with no folds or debris trapped underneath. A pinched diaphragm is the most common cause of a leak that returns minutes after reassembly, and reseating it usually fixes a repair sprinkler valve job for good.
Keeping your irrigation system running smoothly
Most valve problems come down to a torn diaphragm, a dead solenoid, or debris that got in the way, and now you know how to spot which one you're dealing with. Once you've reassembled the valve and confirmed the zone cycles cleanly with no leaks at the bonnet, backfill the box and mark its location if the lid tends to sink into the soil over time. Regular checks twice a year, especially before the rainy season hits Central Florida, will catch a failing valve before it floods a bed or leaves a zone bone dry.
Some repairs go beyond a diaphragm swap, though. Cracked mainlines, wiring that's corroded underground, or a valve manifold that's simply outdated all call for a professional look. If your system needs more than a weekend fix, or you'd rather skip the muddy valve box altogether, reach out to TWQ for sprinkler valve repair in Sebring FL you can count on.