
How to Repair a Sprinkler Head: Step-by-Step Guide
A cracked sprinkler head can waste hundreds of gallons of water in a single week and leave brown patches all over an otherwise healthy lawn. If you have noticed a geyser shooting up from your yard or a head that just will not pop up anymore, you do not need to call in help right away. Most of the time, you can repair sprinkler head issues yourself with a few basic tools and about 20 minutes.
This guide walks you through how to repair a sprinkler head whether the problem is a clogged nozzle, a cracked body, or a broken riser. You will learn how to diagnose the issue, pick the right replacement part, and get water flowing evenly again without digging up your whole irrigation line.
We will also cover typical repair costs , so you know what a fair price looks like whether you buy the part yourself or bring in a pro. And since not every sprinkler problem is a simple fix, we will point out the situations where calling a professional actually saves you time, money, and a soggy yard, plus how to find irrigation sprinkler repair near you.We handle this kind of work daily across Central Florida, so we will share what actually works in the field, not just textbook advice.
Before you start: diagnose the problem and gather supplies
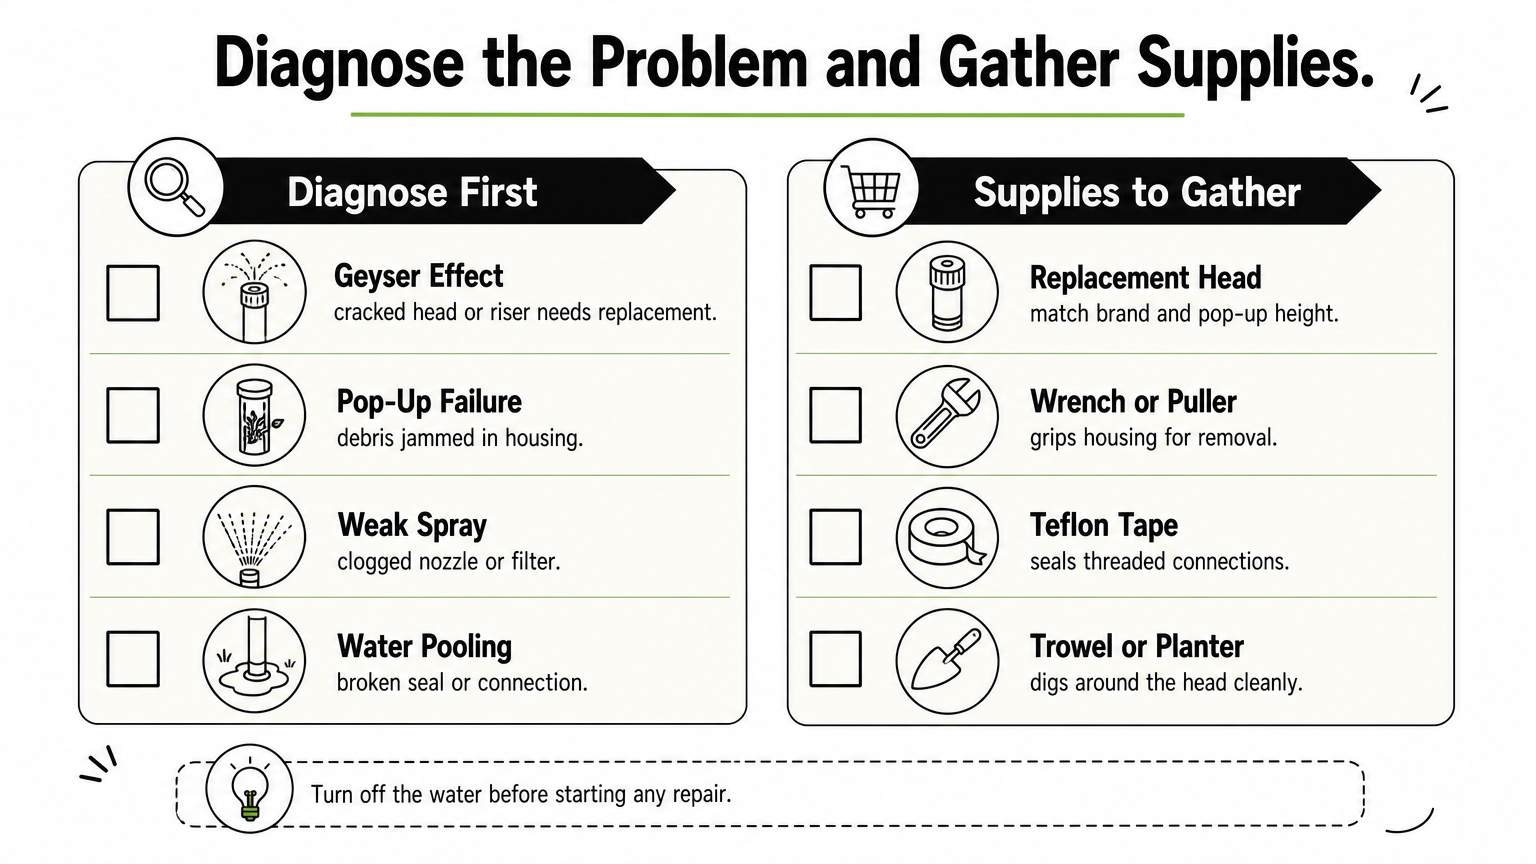
Grab a notepad and walk your yard while the system runs a full cycle. Sprinkler head repair always starts with figuring out what actually broke, since a clogged nozzle needs a five-minute fix while a cracked riser means digging around the base. Look for water pooling in one spot, a head that stays sunk into the ground, or spray patterns that shoot sideways instead of in an arc. Watching the problem happen live tells you more in two minutes than guessing ever will, which is exactly what a professional sprinkler system inspection is built around.
Match the symptom to the fix
Different symptoms point to different repairs, and knowing which one you're dealing with saves you a trip back to the hardware store.
| Symptom | Likely Cause | Typical Fix |
|---|---|---|
| Geyser or fountain effect | Cracked head or riser | Replace the head or riser |
| Head won't pop up | Debris jammed in the housing | Clean or replace the internals |
| Weak, uneven spray | Clogged nozzle or filter | Rinse or swap the nozzle |
| Water pooling at the base | Broken seal or connection | Replace the seal, sometimes the whole head |
| Head stuck sideways | Damaged riser or housing crack | Replace the riser and head together |
Most sprinkler head problems trace back to one of two culprits: physical damage from mowers or foot traffic, or debris clogging the works.
Gather your supplies before you dig
Once you know what you're up against, pull your supplies together so you're not making three trips to the store mid-repair. Having everything on hand also keeps the repaired zone shut off for the shortest time possible, which matters if you have neighbors sharing your water pressure or a lawn that's already stressed from the leak.
- Replacement sprinkler head (match brand and pop-up height to your existing system)
- Adjustable wrench or sprinkler head puller
- Small flathead screwdriver
- Teflon tape for threaded connections
- Garden trowel or bulb planter for digging around the head
- Bucket for rinsing debris out of nozzles
- Rag or towel to keep the work area clean
Bring the broken part with you to the store, or snap a photo of the brand stamped on the housing. Manufacturers like Rain Bird and Hunter make heads that are not always interchangeable, so matching flow rate and spray radius keeps your zone balanced instead of creating one soggy patch and one dry one.
Step 1. Turn off the water and expose the sprinkler head
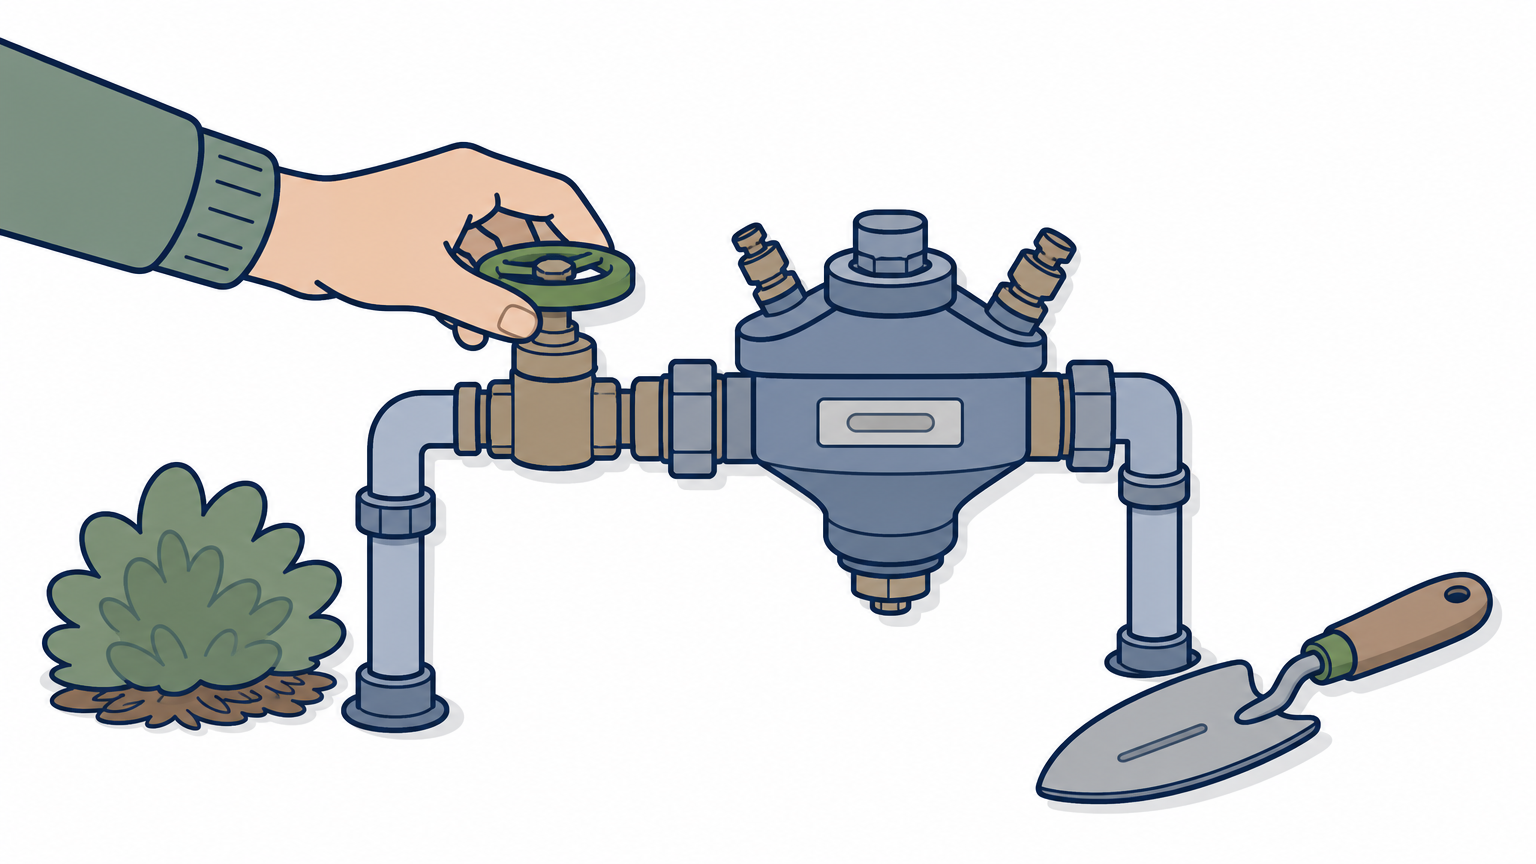
Shutting off water is the step people skip, and it's why they end up soaked or wasting a full cycle's worth of water while they work. Find your irrigation shutoff valve , usually located near the backflow preventer or where the main line enters your yard, and turn it off before you touch anything. If your system runs on a controller, switch that zone off too, so a scheduled cycle doesn't kick on while you're elbow-deep in mud.
Locate and shut off the zone valve
Working zone by zone instead of shutting down your whole system keeps the rest of your lawn watered on schedule while you fix the one broken head. Trace the pipe from the damaged sprinkler back to its zone valve, usually grouped in a valve box with the others, and close that single valve if your setup allows it. This saves time and keeps water pressure steady in the lines you're not touching.
Never dig around a sprinkler head with the water still on. It turns a simple repair into a muddy mess and risks damaging the line further.
Dig around the head without damaging the line
Steady digging beats aggressive digging every time here, since the supply line running to the head sits just a few inches below grade and a careless jab with a shovel can slice right through it. Use a garden trowel or a bulb planter to clear soil in a circle around the head, working down until you can see the full housing and where it connects to the riser or pipe below.
- Clear a 4 to 6 inch radius around the head
- Dig straight down, not at an angle, to avoid nicking the line
- Set soil aside on a tarp or towel for easy backfilling later
- Stop once you can see the riser or pipe connection clearly
Step 2. Remove the broken sprinkler head
With the soil cleared and the zone shut off, you can finally see what you're dealing with. Grip the sprinkler head housing with a sprinkler head puller or an adjustable wrench, positioning the jaws low on the body rather than up near the nozzle where the plastic is thinner and cracks easily. Twist counterclockwise with steady pressure instead of jerking the tool, since a sudden yank can snap the riser off below the threads and turn a five-minute job into a bigger dig.
Separate the head from the riser
Once the threads break loose, unscrew the head by hand the rest of the way so you can inspect the riser underneath. Check the riser itself for cracks, hairline splits, or stripped threads, because a damaged riser needs replacing along with the head, not just the head alone. If the riser looks solid and the threads are clean, you only need to swap the head itself.
A cracked riser hiding under an intact-looking head is the most common reason a "simple" sprinkler repair fails the first time.
Clean the connection point
Before anything new goes in, wipe down the exposed threads on the riser or pipe fitting with a rag to clear away dirt, old Teflon tape, and any grit that fell in while you dug. Inspect the fitting for cross-threading or damage from the old head, since installing a new part onto a compromised connection just recreates the same leak. A clean, dry connection point is what lets the next step go smoothly instead of fighting with a seal that won't seat right.
Step 3. Install and connect the new sprinkler head
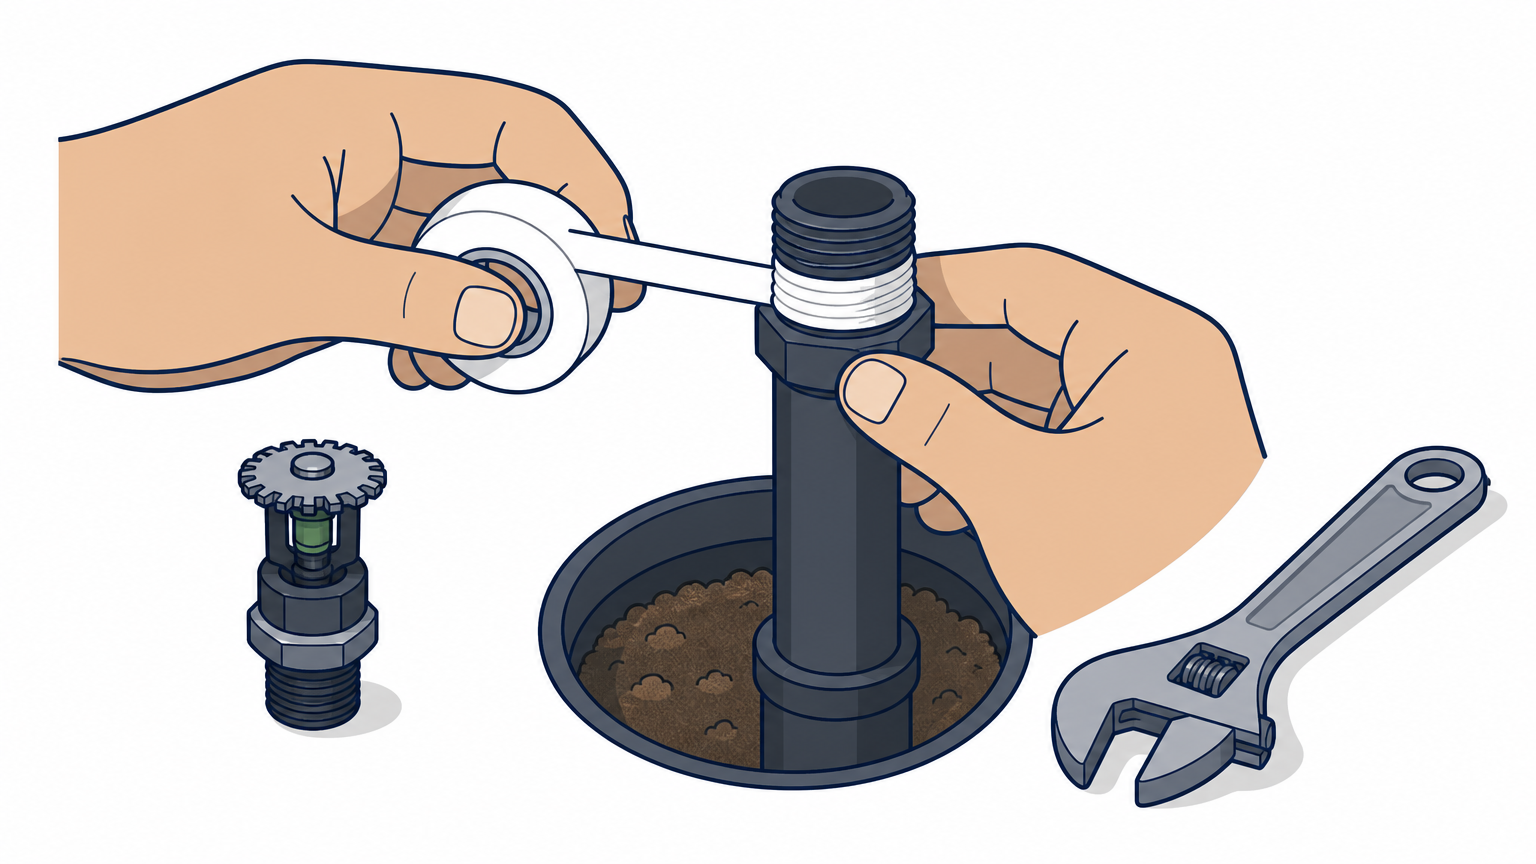
With the old head gone and the threads clean, grab your replacement and confirm it matches the pop-up height and spray pattern of the heads around it. Wrap the riser threads with two or three turns of Teflon tape , working clockwise so the tape doesn't unravel as you screw the head on. This small step prevents the slow leaks that show up weeks later around the base, long after you think the repair is finished.
Thread on the new head
Screw the new head onto the riser by hand first, turning clockwise until you feel resistance, then snug it with the wrench for a quarter turn more. Overtightening cracks the housing just as fast as a bad drop, so stop as soon as it feels snug rather than forcing it further.
- Hand-tighten first to avoid cross-threading
- Use the wrench for a final quarter turn only
- Check that the head sits level with the surrounding soil
- Confirm the nozzle direction matches the intended spray pattern
A properly wrapped thread and a snug, not crushing, fit is what separates a repair that lasts years from one you'll redo next month.
Set the pop-up height
Before backfilling, adjust the head so it sits flush with the ground once the grass grows back in around it. Burying it too low means grass clippings and dirt clog the nozzle again within weeks, while leaving it too high turns it into a tripping hazard and a mower blade target. If you're working across a full property rather than one head, TWQ's residential irrigation services can handle multi-zone repairs so every head sits at a consistent height.
Step 4. Test the system and restore your lawn
Before you bury anything, turn the water back on and watch the head run through a full cycle. This is your last chance to catch a leaky connection or a misaligned nozzle while the area is still open and easy to fix. Skip this check and you risk repeating the whole dig next week because a bad seal only shows itself under real pressure.
Run a test cycle and check the spray pattern
Open the zone valve you closed earlier, or flip the controller back to that zone, and let it run for a full minute. Watch for water bubbling up around the base of the head, since that means the Teflon tape didn't seat right or the connection needs another quarter turn. Check that the spray pattern matches the arc and radius of the surrounding heads, adjusting the nozzle ring with your flathead screwdriver if it's throwing water onto the driveway or leaving a dry gap on one side.
A repair isn't finished until you've watched it run under real pressure. Dry testing tells you nothing about how it holds up.
Backfill and restore the lawn
Once the head is spraying evenly with no leaks at the base, shut the water off again and backfill the hole with the soil you set aside earlier. Tamp it down gently around the housing so the head stays level with the grade, then press any lifted sod back into place and water it by hand for a day or two while it knits back down. If the repaired spot already shows a brown patch from the original leak, a light layer of grass seed or a small sod patch for turf replacement speeds up recovery faster than waiting on the sprinkler alone.
Keeping your irrigation system running smoothly
A broken sprinkler head is one of the easiest yard problems to fix once you know the steps: shut off the water, dig carefully, swap the head, and test before you backfill. Most homeowners can knock this out in under an hour with parts that cost less than a fast food meal. The bigger win is catching these issues early, since a head running wild for even a few days can waste thousands of gallons and leave dead patches that take a full season to bounce back.
Check your system monthly, especially after mowing or heavy foot traffic, so small cracks never turn into flooded yards or dry spots. If you'd rather hand off the whole job, or you're managing several zones across a larger property, TWQ's sprinkler head and irrigation repair service covers Central Florida so your lawn stays green without the guesswork.