
How to Repair a Sprinkler System: Step-by-Step Fixes
A soggy patch by the driveway, a dry brown circle in the middle of the lawn, a zone that never shuts off. These are the signs that push most Sebring homeowners to search for repair of sprinkler system help before their water bill or their turf takes the hit. The good news is that most sprinkler problems come from a short list of usual suspects, and many of them you can fix yourself with a screwdriver and an afternoon.
This guide walks you through diagnosing common sprinkler problems like broken heads, clogged nozzles, low pressure, and valve failures, then shows you the exact steps to fix each one. You'll also get a realistic idea of when a DIY sprinkler fix makes sense versus when the issue points to a bigger irrigation problem underground.
We've spent over 20 years installing and repairing irrigation systems across Central Florida, so we know which fixes hold up through our sandy soil and summer storms. Below, you'll find step-by-step repairs, a rundown of what you'll actually pay for professional sprinkler repair, and guidance on when it's time to call in a licensed irrigation crew instead of digging up your yard.
Diagnose common sprinkler system problems
Walking your property zone by zone tells you more than any troubleshooting chart. Before you touch a wrench, run through every zone manually using your controller and watch what happens at each head. A soggy patch near the edge of your driveway usually means a cracked lateral line or a stuck valve, while a dry, browning circle in the middle of the lawn almost always traces back to a clogged or broken head that isn't throwing water far enough.
Symptoms and their likely causes
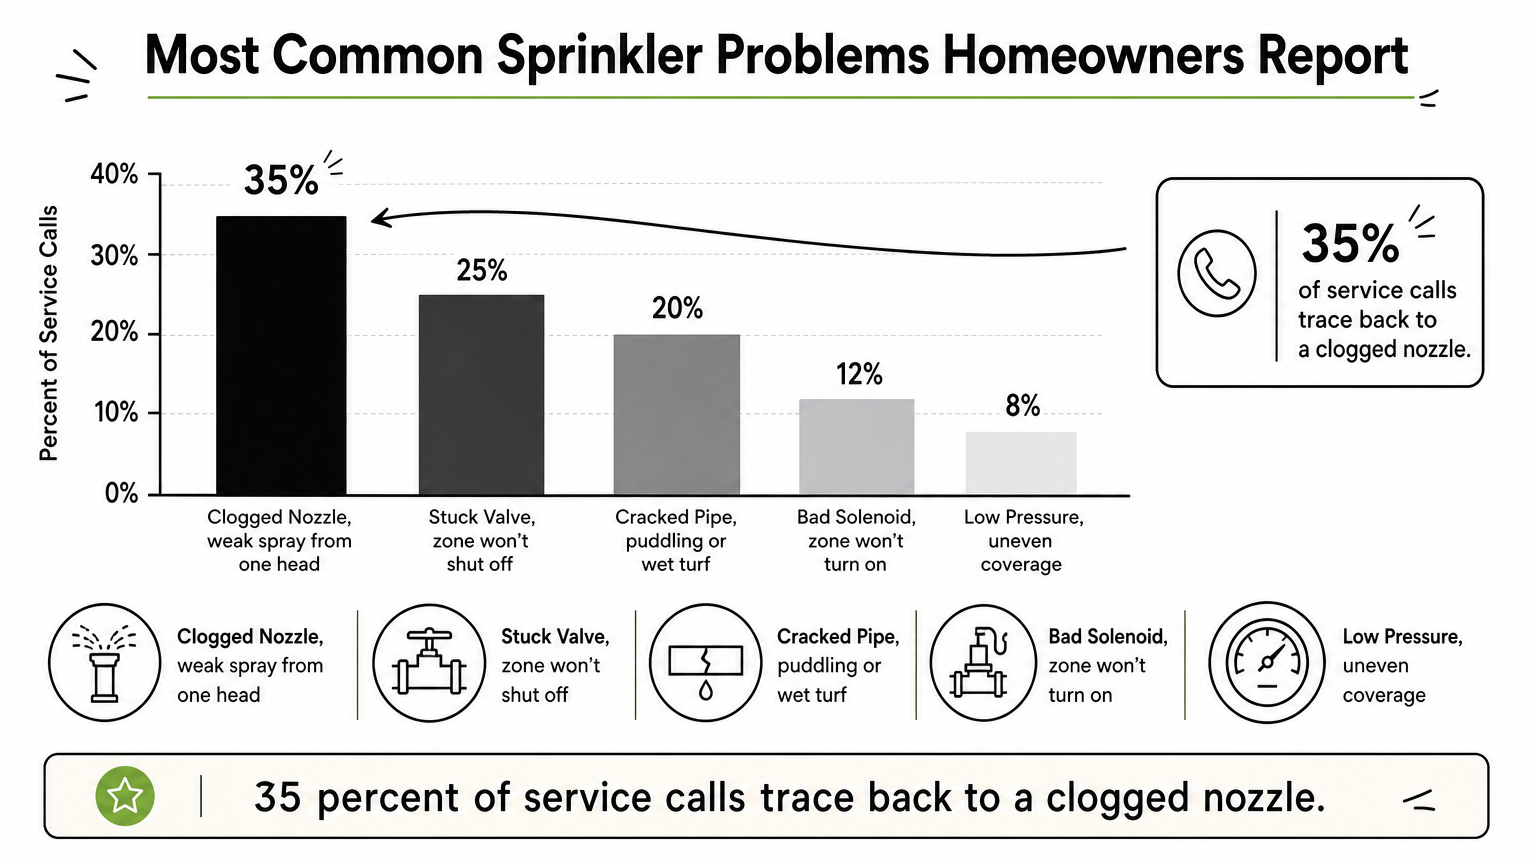
Most irrigation calls we run in Sebring and Lake Placid boil down to a handful of repeat offenders. Use this table to narrow down where to start looking before you grab a shovel.
| Symptom | Likely Cause | Quick Check |
|---|---|---|
| Zone won't shut off | Stuck valve diaphragm or debris in valve | Manually close valve at the box |
| Weak or no spray from one head | Clogged nozzle or filter screen | Pull head, inspect filter |
| Puddling or wet spot on turf | Cracked pipe or leaking valve seal | Dig 6 inches around the wet area |
| Zone won't turn on at all | Bad solenoid or wiring break | Test solenoid with a multimeter |
| Uneven coverage across the yard | Low water pressure or mismatched nozzles | Check PSI at the backflow preventer |
Test each zone before you dig
Once you've spotted a pattern, confirm it by running that single zone again and standing right next to the suspect head or valve box. Listen for hissing, watch for spray direction, and check whether water pools at the base of the head. This step alone saves homeowners from digging up perfectly good pipe chasing a problem that's actually a clogged nozzle.
Fix the symptom you can see before you assume the problem is buried underground.
Getting this diagnosis right matters, because repair sprinkler systems work almost always starts above ground, and it tells you what to look for in a sprinkler repair company if the job turns out bigger than expected. Heads and valves fail far more often than the pipe itself, especially in Central Florida's sandy soil where roots and lawn equipment do most of the damage. Once you know which category you're dealing with, the fix usually takes less than an hour.
Step 1. Turn off the water and dig around the sprinkler
Before you touch a single fitting, shut off the water supply at the backflow preventer or the main valve feeding your irrigation system. Skipping this step is how homeowners end up soaked and frustrated halfway through a five-minute fix. If you're not sure which valve controls your system, trace the pipe back from your controller box, most Sebring homes route the main line through a shutoff valve near the water meter or well pump.
Clear the area around the damaged component
Once the water's off, grab a hand trowel or a small shovel and dig a shallow trench around the sprinkler head or valve box, roughly six inches deep and wide enough to work with both hands. Sandy Central Florida soil moves easily, so you won't need much muscle here. Set the soil aside on a tarp so you can pack it back in cleanly when you're done, and keep pets or kids away from the open hole while you work.
A five-minute dig now saves you an hour of guessing later.
Digging around the sprinkler before diagnosing further lets you see exactly what you're dealing with, a cracked riser, a loose fitting, or a valve with a torn diaphragm. Brush away loose dirt from the fitting threads and the base of the head so you have a clear view of the connection points.
Check for hidden damage
Look past the obvious. Run your fingers along the pipe a few inches in each direction from the head, feeling for cracks, soft spots, or shifted couplings that a quick glance might miss. Catching a second problem now beats digging the same spot twice.
Step 2. Replace a broken sprinkler head
A cracked or clogged head is the most common reason people search for repair of sprinkler system fixes, and it's also the easiest one to knock out yourself, as our full walkthrough on repairing a sprinkler head shows. Once you've dug around the base, twist the damaged head counterclockwise to unscrew it from the riser, or unclip it if it's a pop-up model seated in a housing. Bring the old head to the hardware store or match the brand and spray pattern online before buying a replacement, since mismatched nozzles throw off your whole zone's coverage.
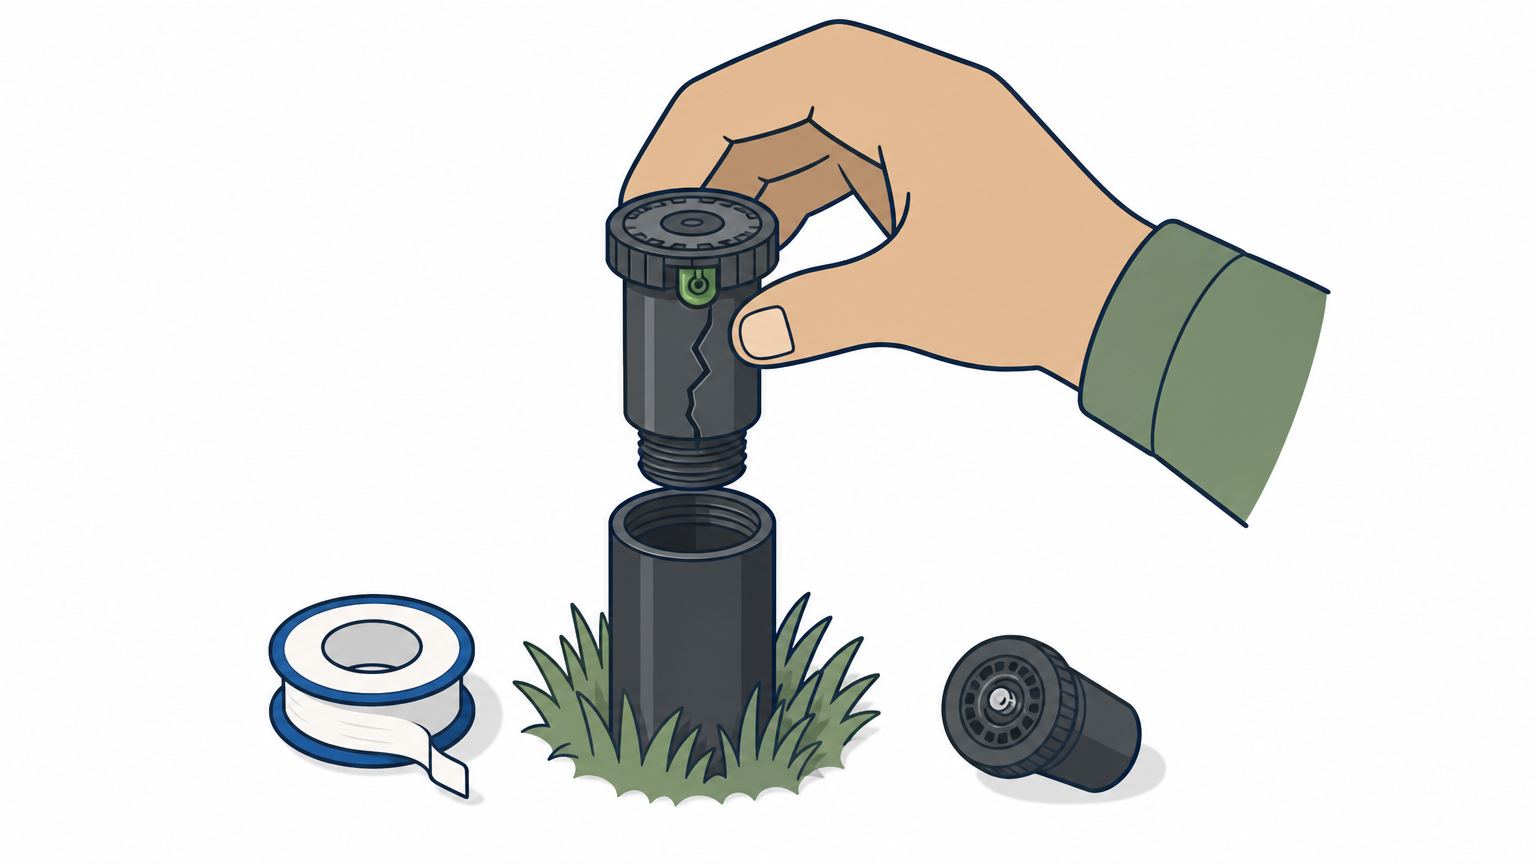
Unscrew the old head and match the replacement
Follow these steps to swap the head cleanly:
- Turn the old head counterclockwise and lift it off the riser.
- Wrap the riser threads with two turns of Teflon tape.
- Thread the new head on clockwise until snug, not overtightened.
- Adjust the arc and radius dial to match the surrounding heads.
Match the nozzle, not just the brand, or your whole zone's coverage suffers.
Test the new head before backfilling
Run the zone again with the new head installed and watch the spray pattern for a full cycle. Check that water reaches neighboring heads without overshooting sidewalks or windows, and confirm there's no hissing or spray at the base, which signals a loose thread connection. Backfill the hole only after you're satisfied with the pattern, packing soil firmly around the riser so it doesn't lean over time.
Getting a repair sprinkler job right at this stage means one less callback next month. If you're still seeing weak pressure after the swap, the problem likely sits upstream at the valve, which we'll cover next.
Step 3. Repair or replace a faulty valve
When a whole zone won't shut off or won't turn on at all, the valve is almost always the culprit, not the heads. Find the valve box near where that zone's pipe branches off, usually a green plastic lid flush with the turf, and pull it open to expose the valve body. A repair lawn sprinkler job at the valve level takes a bit more patience than swapping a head, but it's still well within reach for most homeowners with basic tools.
Open the valve and inspect the diaphragm
Unscrew the bonnet on top of the valve, usually two or four screws, and lift out the diaphragm and solenoid assembly carefully. Check the rubber diaphragm for tears, warping, or debris caught in the seat, since a torn diaphragm is the number one reason a valve sticks open or won't seal.
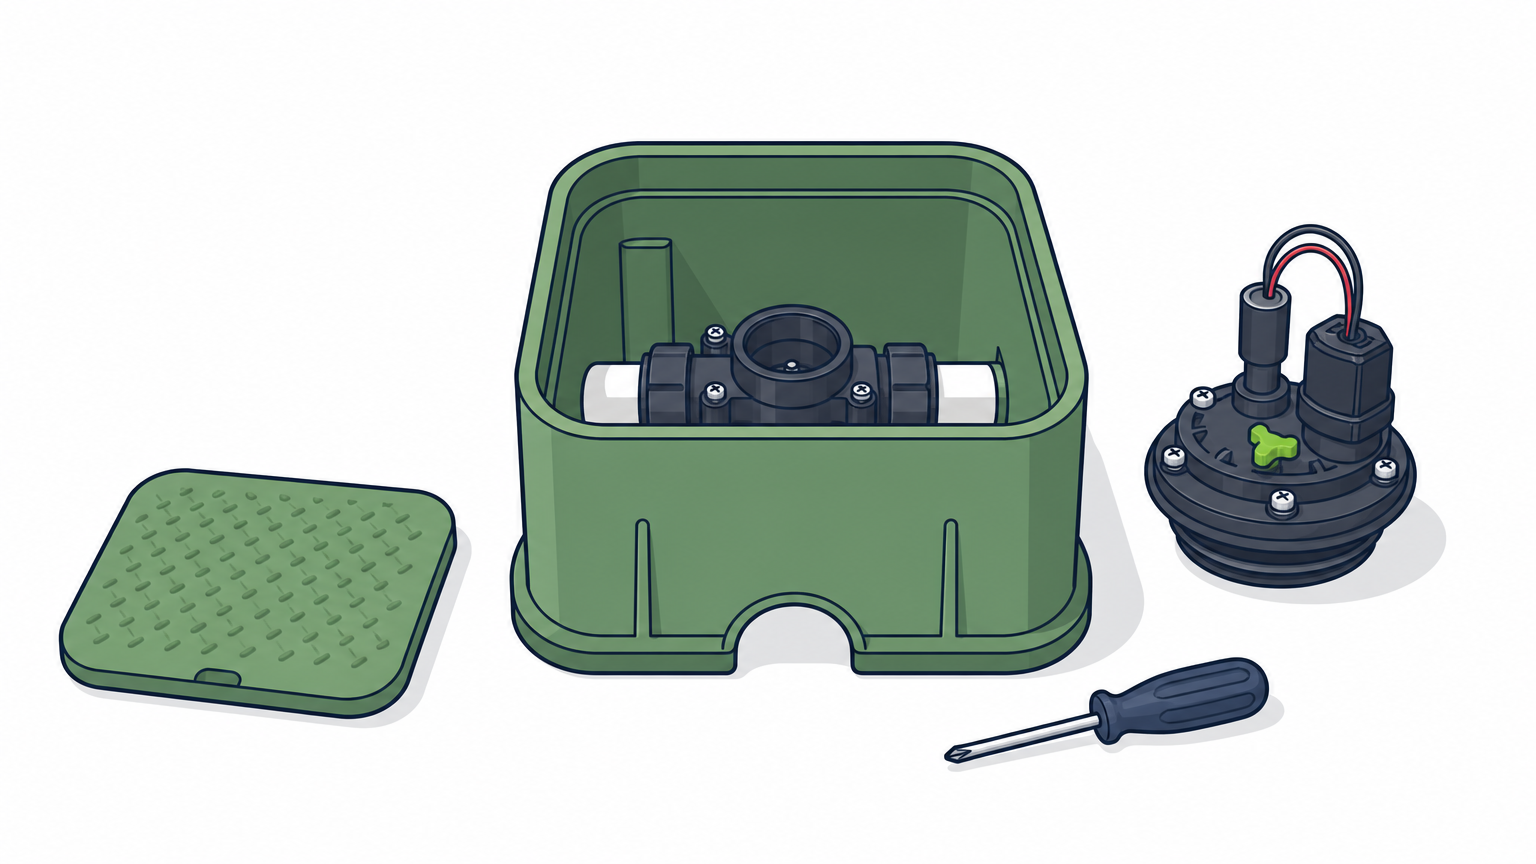
A torn diaphragm almost always explains a zone that refuses to shut off.
Clean, rebuild, or replace
Rinse out any sand or grit lodged in the valve body with a garden hose, since Central Florida's sandy soil works its way into these seats more than most regions see. If the diaphragm looks cracked or brittle, buy a rebuild kit matched to your valve brand rather than replacing the whole valve, since kits run under $15 and take fifteen minutes to install. Reassemble the bonnet, turn the water back on slowly, and run the zone to confirm it opens and closes cleanly. If water still weeps past a rebuilt valve, the valve body itself is likely cracked and needs full replacement, which means cutting out the old fitting and gluing in a new one with PVC cement.
Step 4. Fix a bad solenoid or wiring issue
When a zone won't activate at all, and the valve itself looks fine, the problem usually sits in the electrical connection feeding it. Solenoids fail from age, moisture intrusion, or a rodent chewing through buried wire, and testing one takes less than five minutes with a multimeter. Grab the wires running to the solenoid from the valve box and disconnect them from the controller terminal before you test anything.
Test the solenoid with a multimeter
Set your multimeter to the ohms setting and touch the probes to the two solenoid wires. A healthy solenoid reads between 20 and 60 ohms depending on the brand. Anything showing zero or infinite resistance means the solenoid is dead and needs replacing.
 Multimeter reading guide:
- 20-60 ohms: solenoid is good, check wiring instead
- 0 ohms (short): solenoid is fried, replace it
- Infinite/OL: broken coil, replace it
A multimeter test tells you in five minutes what an hour of digging won't.
Trace and splice damaged wire
If the solenoid tests fine, walk the wire run back toward the controller looking for exposed copper, chewed insulation, or a splice that's corroded green. Splice any bad section using waterproof wire connectors rated for direct burial, never electrical tape, since Florida's humidity breaks tape down within a season. Outdoor sprinkler system repair jobs that involve wiring almost always trace back to a splice sitting in standing water, so bury your repaired connection above the water table when you backfill. Reconnect everything to the controller and run a manual test before closing up the valve box for good.
Keeping your sprinkler system running smoothly
Most sprinkler problems trace back to the same short list: a cracked head, a stuck valve, or a chewed wire. Working through the four steps above, from digging around the fitting to testing a solenoid with a multimeter, handles the vast majority of issues without calling in a crew. Regular walkthroughs of each zone, whether you do them yourself or schedule irrigation system inspections in Sebring, catch small problems like a clogged nozzle or a weeping valve before they turn into a dead patch of lawn or a spiked water bill.
Some jobs, though, go past a Saturday afternoon fix. Cracked mainlines, buried electrical shorts, or a controller that won't hold a program point to deeper sprinkler system issues and what they cost to fix, which are easier to solve with the right tools and two decades of experience behind you. If your system needs more than a quick patch, reach out to TWQ for sprinkler and irrigation repair in Sebring FL, and get your lawn back on a schedule that actually works.