
Sprinkler Heads Repair: How to Fix or Replace One Yourself
For most lawns, sprinkler heads repair is a 20-minute job once you have the right part. Clean the nozzle and filter first. If the head still leaks, sticks, or sprays the wrong way, dig it out, unscrew it, and thread a matching new head onto the fitting with plumber's tape. Then flush the line and aim the spray. You need a hand trowel, a tarp or bucket, plumber's tape, and a replacement that matches the old head.
The trouble is that a broken head rarely tells you what is wrong. A mower clips a riser, a head stays up after the zone shuts off, a geyser floods a bed, or one brown patch appears in an otherwise green lawn. Guess the cause wrong and you buy the wrong part. Or you replace a head when the real problem is a cracked pipe.
This guide walks you through diagnosis, quick fixes, removal, installation, and adjustment, in that order. It draws on the same work our irrigation team does for homeowners in Sebring and across Central Florida. It also tells you when a repair is bigger than a Saturday job.
Diagnose the head before you buy parts
A five-minute symptom check decides which fix you need and keeps you from buying parts you will not use. Run the zone, walk it slowly, and watch every head.
Match the symptom to the likely cause
Use this table to connect what you see with the most probable cause. Most head problems fall into the first five rows. The last row points to something below ground.
| What you see | Likely cause | Fix |
|---|---|---|
| Head stays up after shutoff | Dirt or mineral buildup on the riser, or a weak spring | Clean the riser (Step 1), replace the head if it sticks again |
| Short, weak, or uneven spray | Clogged nozzle or filter | Rinse both (Step 1) |
| Water gushes from a bare fitting | Head broken off or knocked loose | Replace the head (Steps 2 and 3) |
| Water seeps around the cap or base | Loose cap, debris under the seal, or cracked body | Tighten and flush, replace if it still leaks |
| Fine mist instead of droplets | Clogged nozzle or pressure too high | Rinse, or fit a head with a pressure regulator |
| Soggy ground while all heads work | Possible damaged pipe | See the last step |
Fixed spray heads mostly clog or stick. Rotary heads use a gear drive, so they can also stall or stop turning. Knowing which type you have tells you what to expect when you open it up.
Gather the tools and a matching head
Take the old head to the store, or photograph it before you leave. Buy the same type (spray or rotary), the same pop-up height, and the same thread size. Manufacturers usually print the specs on the top or side of the unit. A mismatched head throws a different pattern and upsets the coverage of the heads around it.
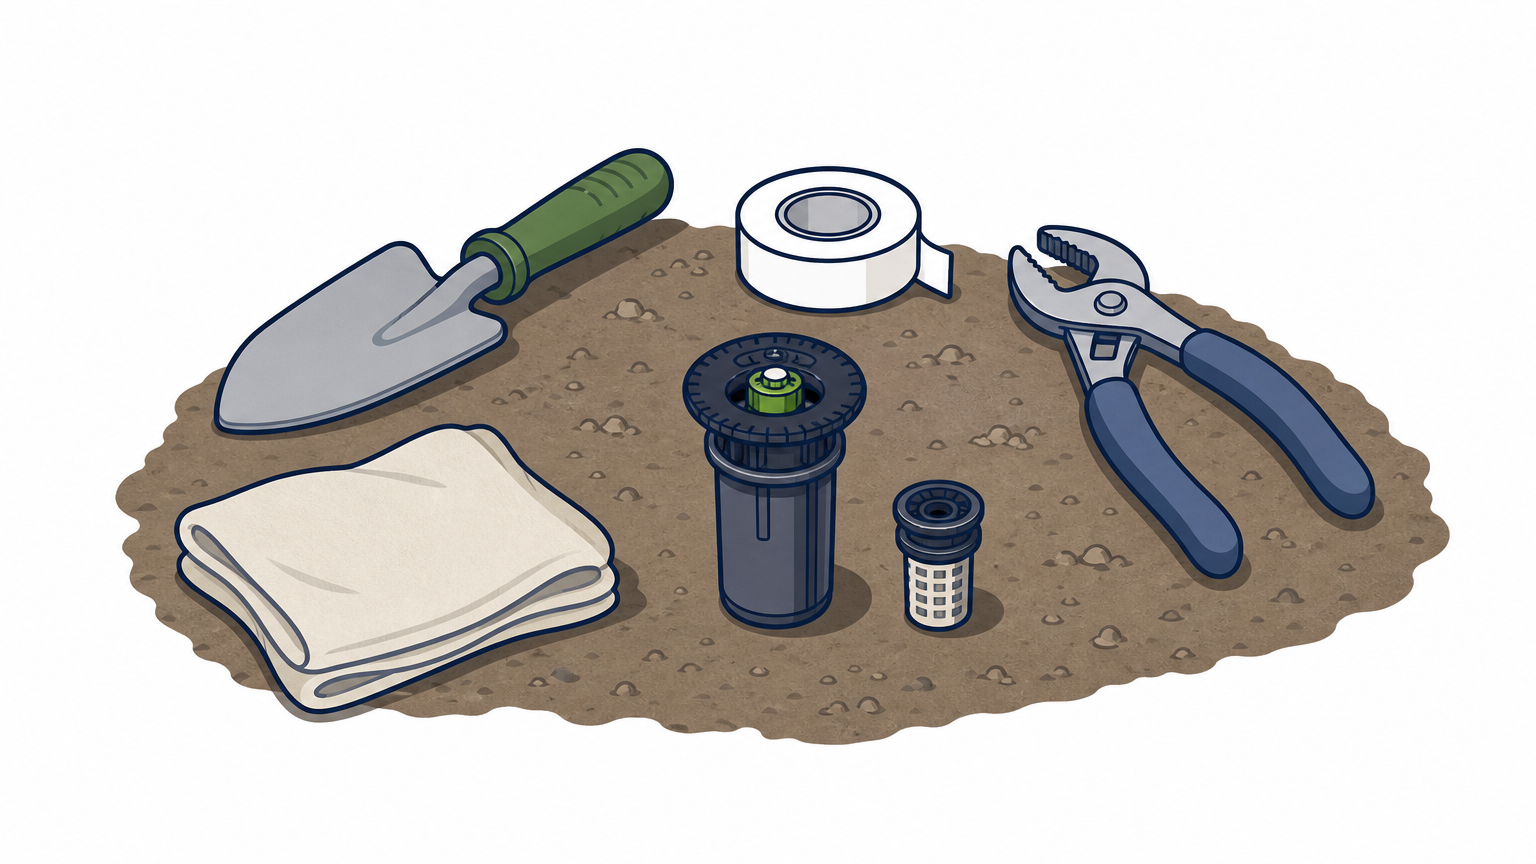
Match the new head to the old one by type, height, and thread, or the whole zone waters unevenly.
Gather these before you dig:
- Hand trowel or small spade
- Tarp, bucket, or trash can lid for the turf and soil
- Plumber's tape
- Replacement head, plus a spare nozzle and filter
- Clean rag to plug the open pipe
- Pliers or a thread extractor for broken stubs
Step 1. Try the quick fixes first
Clean the nozzle and filter, then free the riser. These two fixes solve a large share of sprinkler head repair calls, and they cost nothing.
Clean the nozzle and filter
Turn the zone on. Hold the spray stem down for a minute so the flow pushes out debris stuck along the stem and cap. If the spray is still weak, turn the zone off and unscrew the nozzle counterclockwise. Pull out the small basket filter under it and rinse both parts under a tap. Reinstall them, and make sure the filter sits in place, or the spray distance will not adjust properly.
Free a stuck riser
If the head stays up, shut the zone off first. Twist off the cap and lift out the entire riser . Wipe it clean and clear any grit from the body, then flush the line with a few seconds of water. Drop the riser back in and test it by pulling it up. It should drop on its own.
If it still sticks, the spring or seal is worn. You can match parts, but I recommend replacing the whole head. It costs little, the old body is probably the same age as the failed spring, and something else will give out soon.
If cleaning does not fix a stuck or leaking head, replace the whole head instead of chasing small parts.
Step 2. Dig out and remove the broken head
Shut off the zone, cut out a neat block of turf, and unscrew the old head by hand. Work slowly, because the pipe sits only inches below the grass.
Shut off the water and cut the turf
Turn off the zone at the controller and the water supply. If you can, wait 24 to 48 hours after the last watering so the soil is damp but not muddy. Cut a square of turf about 6 inches across around the head and lift it intact onto your tarp. Dig down 5 to 6 inches with the trowel until you can see the fitting. Use hand tools only. If you need to dig beyond the head itself, call 811 first (Sunshine 811 in Florida) so buried lines are marked.
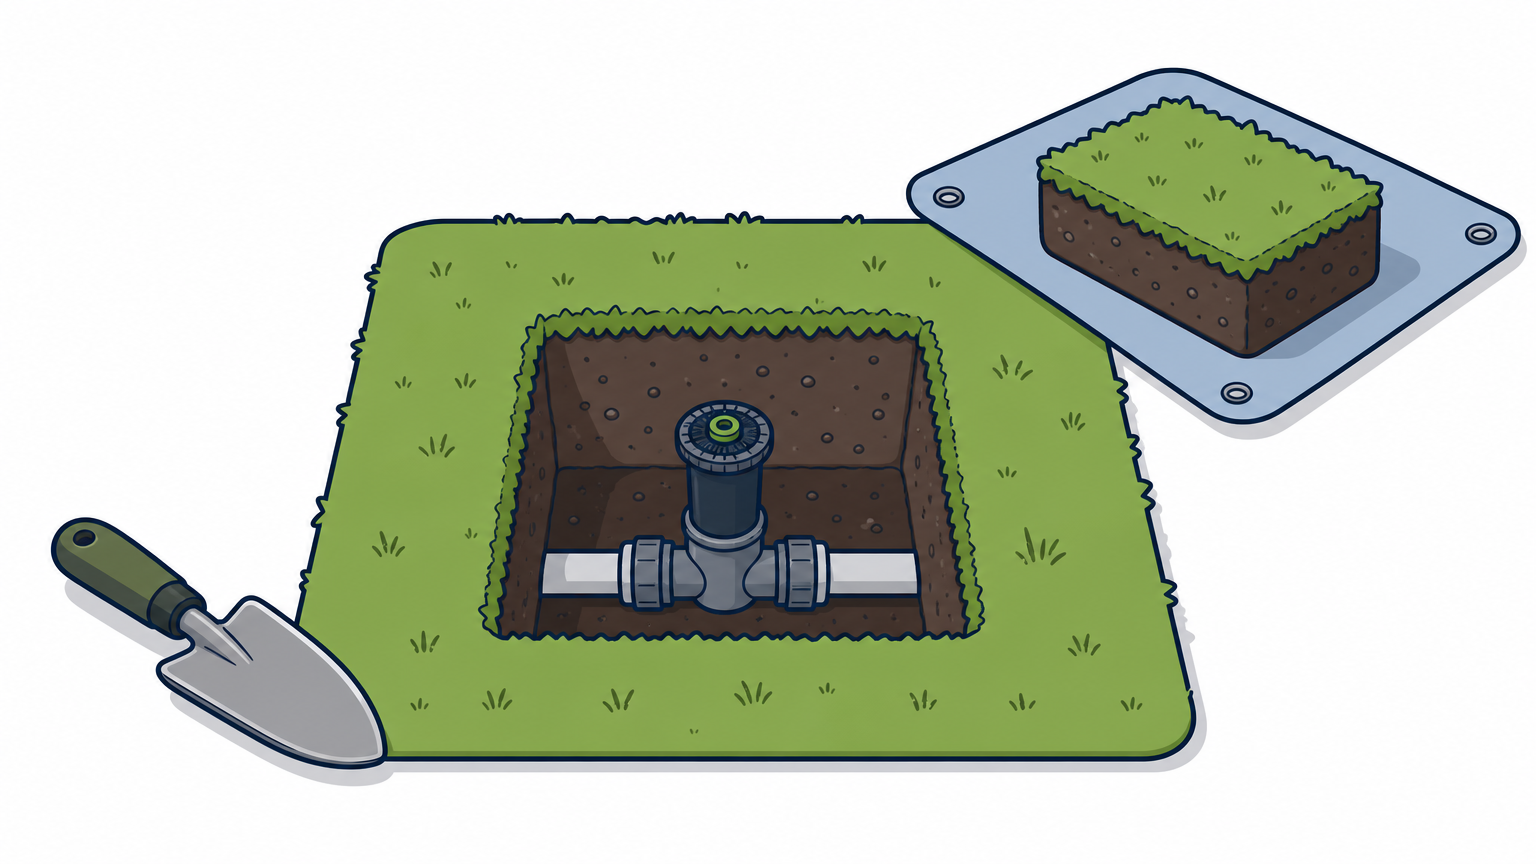
Unscrew the old head
Turn the head counterclockwise. Support the fitting with your other hand so it does not twist the pipe. Stuff the rag into the open fitting right away, because dirt in the line causes clogs in every head downstream.
Check the threaded fitting under the head. If it is cracked or the threads are stripped, dig further and replace the riser or fitting with one of the proper thread and length.
If the head snapped off at the base, a threaded stub remains in the fitting. Grip it with pliers, or use a thread extractor, and turn it counterclockwise. If it will not budge, stop. Forcing it can crack the line below.
Keep dirt out of the open pipe, because one pebble can clog a head you just installed.
Step 3. Install the new head and flush the line
Flush the open line, wrap the threads with plumber's tape, and screw the new head on by hand. The order matters here.
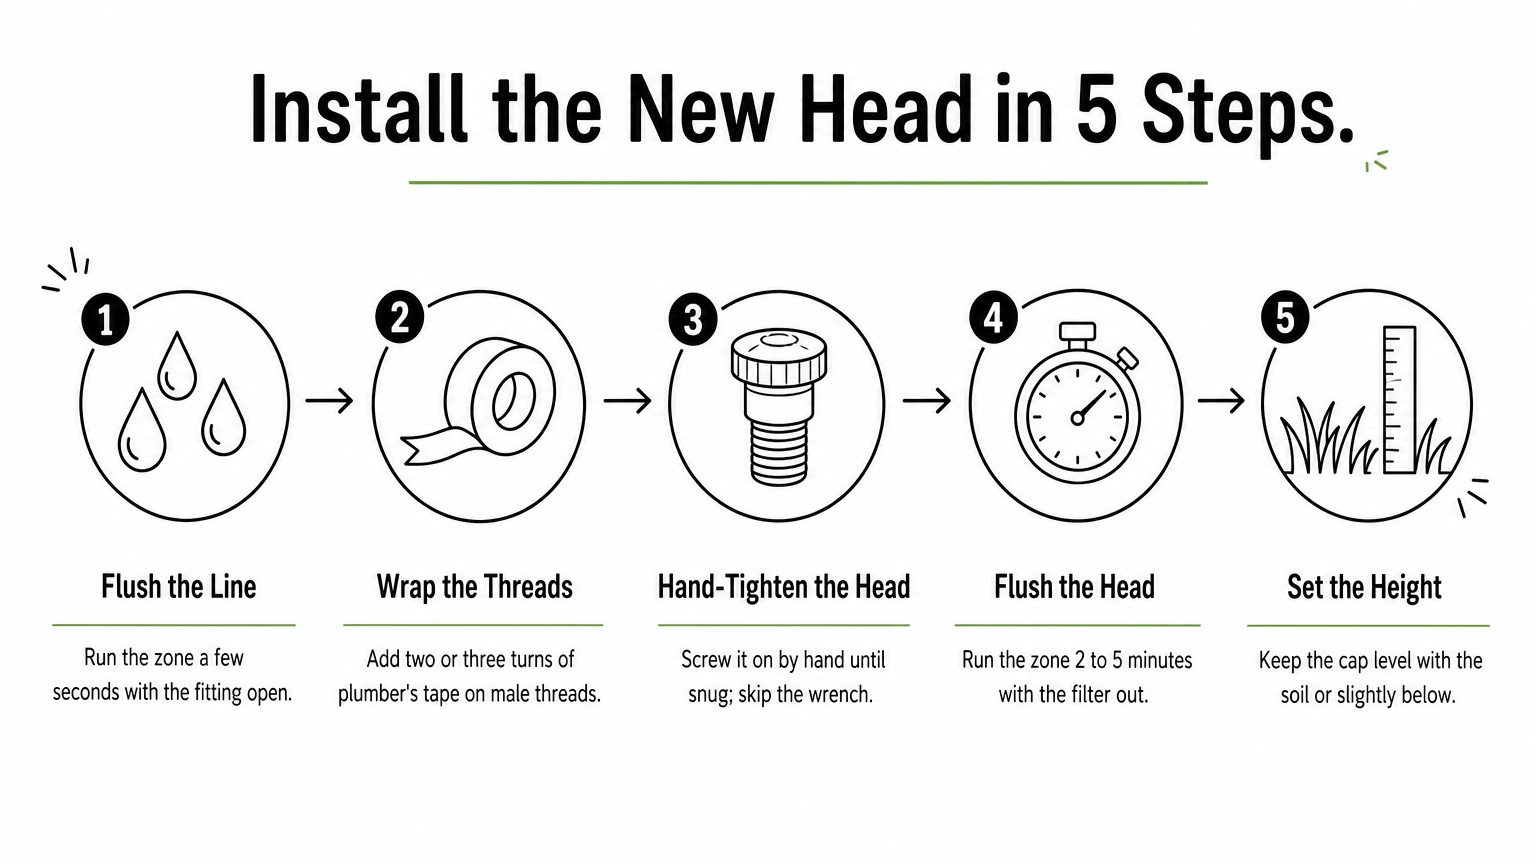
Flush before you install
Pull the rag and turn the zone on for a few seconds with the fitting open. Let the water push out any dirt, then shut the zone off. Remove the nozzle and filter from the new head, thread it on in the next step, and refit them afterward. Flushing with the filter out clears more grit.
Thread the head and set its height
Clean the threads. Wrap plumber's tape two or three turns around the male threads, in the direction the head will tighten. Screw the new head onto the riser by hand until snug. Do not use a wrench. Overtightening cracks plastic bodies.
Then run the zone for 2 to 5 minutes to flush the head. Shut it off, insert the filter, and screw the nozzle back on. The top of the cap should sit level with the soil or slightly below it, so a mower passes over it without clipping.
Say a mower clipped three heads in one zone. Budget about an hour for all three, plus a trip to the store for matching heads.
Step 4. Aim, test, and know when to call a pro
Set the spray pattern, backfill the hole, and run the zone to confirm coverage. If water still pools afterward, the problem is below ground.
Adjust aim and distance
On Rain Bird spray heads, turn the water on and twist the stem to set the left spray edge. You will feel resistance and hear a click. Then turn the screw on top of the nozzle to cut spray distance by up to 25% . Adjustable nozzles have a dial you twist for the arc.
A rotary head that will not turn usually has debris in the nozzle or a worn gear drive. Clear the nozzle and replace the head if it still stalls.
Backfill and test
Replace the soil and press the turf block back in place. Run the zone for several minutes. Check that the spray reaches the neighboring heads, with head-to-head coverage , and that no water pools. Look at the repair again the next day. Walk every zone twice a year to catch the next failure early.
When to call a pro
Call a professional when water keeps pooling after the head is replaced, when pressure is low across a whole zone, or when several heads fail at once. Those point to a broken pipe, a valve, or a pressure problem. That is where TWQ's irrigation repair and wet check services come in. We diagnose these problems on residential and commercial properties, so you pay for finding the fault rather than for guessing at parts.
Finish the job, or hand it off
A repaired head comes down to six moves: diagnose, clean, dig, swap, flush, and aim. Most jobs end at the first or second move. If the fix reaches below the head, matching parts to a whole zone takes more tools than a trowel.
If your lawn still has a dry patch or a soggy spot after you finish, request a free estimate from TWQ. We respond within one business day and walk the property before giving you a written estimate.